 Docs
DocsShopware
Integrate Cost+ with your Shopware 6 store using the official payment plugin

Integrate Cost+ as a payment method in your Shopware 6 store. The official NoPayn Payment plugin supports multiple payment methods per sales channel and uses the Hosted Payment Page flow — fully PCI DSS compliant.
Prerequisites
- Active Cost+ merchant account
- Shopware 6.7 or later
- PHP 8.2 or later
- SSH or terminal access to your Shopware server
Supported Payment Methods
| Checkout Name | Technical Name | NoPayn Identifier |
|---|---|---|
| Credit / Debit Card | nopayn_credit_card | credit-card |
| Apple Pay | nopayn_apple_pay | apple-pay |
| Google Pay | nopayn_google_pay | google-pay |
| Vipps MobilePay | nopayn_vipps_mobilepay | vipps-mobilepay |
Each method can be enabled or disabled per sales channel from the plugin configuration.
1. Install the Plugin
Clone or copy the plugin into your Shopware custom/plugins/ directory:
cd /path/to/shopware/custom/plugins
git clone git@github.com:NoPayn/shopware.git NoPaynPayment
Then install and activate via the Shopware CLI:
bin/console plugin:refresh
bin/console plugin:install NoPaynPayment --activate
bin/console cache:clear
2. Configure the Plugin
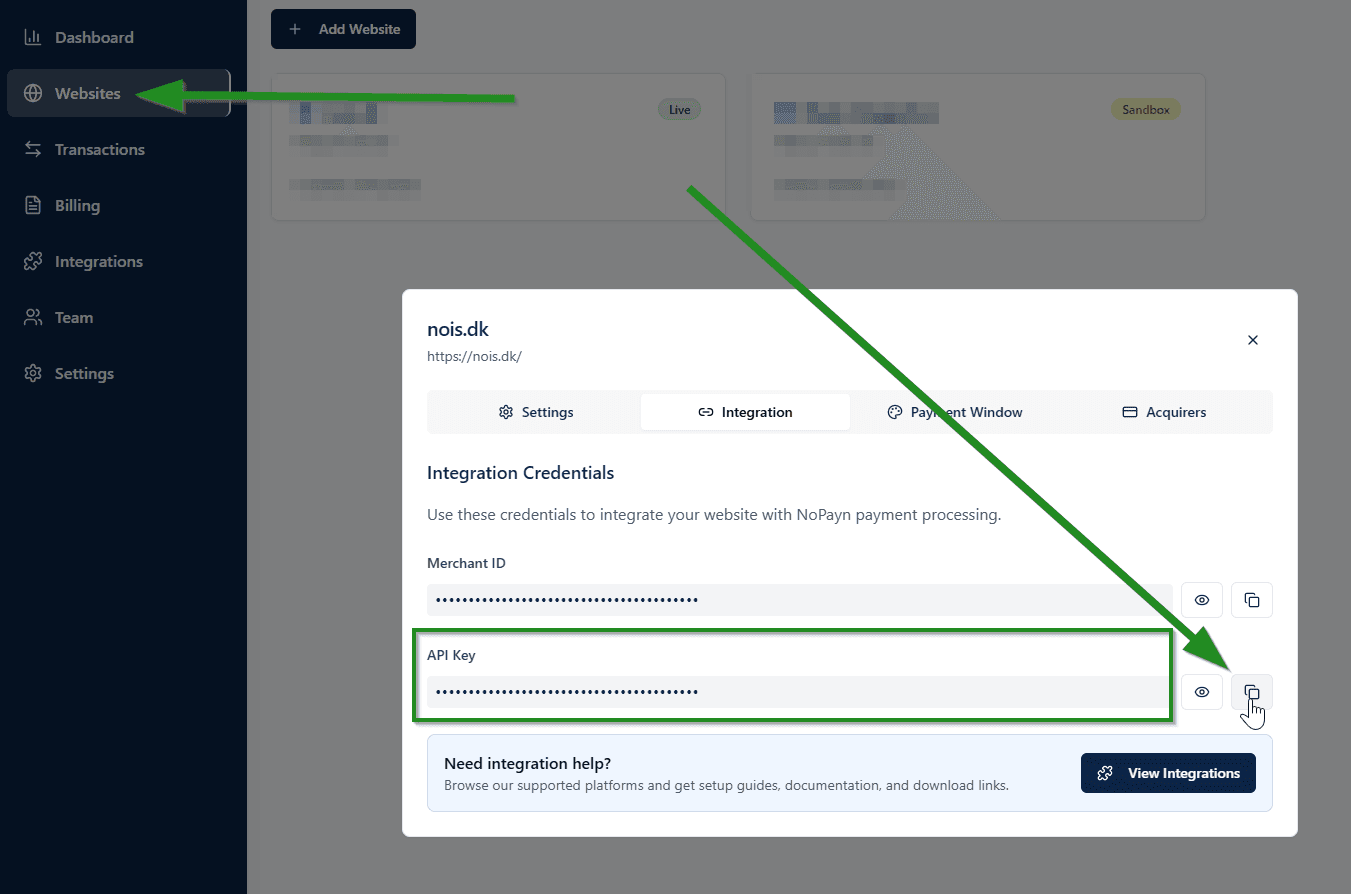
- In your Shopware admin, go to Settings → Extensions → NoPayn Payment
- Enter your API Key from the Merchant Portal — navigate to Websites, click on the website you want to connect, then click Integration to find your API key
- Toggle individual payment methods on or off
- Save
You can configure a different API key per sales channel if you operate multiple storefronts.
Only activate the payment methods you have been approved for and received confirmation for.
3. Payment Flow
- Customer selects a payment method at checkout and places the order
- The order is created with transaction status in_progress
- Customer is redirected to the NoPayn Hosted Payment Page
- After payment:
- Success — customer returns, status is verified via API, transaction set to paid, order set to processing
- Cancelled — customer returns, transaction and order set to cancelled
- Expired (5-minute timeout) — webhook fires, transaction and order set to cancelled
4. Order Status Mapping
| NoPayn Status | Transaction State | Order State |
|---|---|---|
new | in_progress | open |
processing | in_progress | open |
completed | paid | in_progress |
cancelled | cancelled | cancelled |
expired | cancelled | cancelled |
error | cancelled | cancelled |
5. Webhooks
The plugin automatically registers a webhook endpoint at /api/nopayn/webhook. This URL is sent to NoPayn when creating orders, providing asynchronous status confirmation for all transactions.
No manual webhook configuration is required — the plugin handles registration automatically.
6. Test and Launch
Place a few test transactions to ensure everything works smoothly. We recommend testing both successful and failed payments to confirm all scenarios are handled correctly.
Support
Need help? Reach out to our support team at support@costplus.io.